
Good morning everyone! Hope you are all staying warm. We have been hit by some pretty frigid air this last week and today is no different - it's a balmy -5 degrees outside right now. This is perfect weather for inside projects!
A reader sent me a message stating that they would like a little bit of background information about me, and as to why I have so many projects going on in my home.
Where to begin...My name is Sarah. I am a wife, mother, daughter, sister, aunt, and friend. I was recently married to my wonderful husband in August 2013. We have three wonderful children in our blended family. Chloe is 12, Maddox is 10, and Joaquin is 6. In late November 2013, we bought our first home. We spent months looking for a home as we wanted one with enough space for our children and also for entertaining our large families. Our home is quite eccentric, and I am proud to say it has a wonderful history. It was built in 1947 and we are only the third owners. While our home was very well maintained throughout the years, it was never updated. When our realtor showed us the home, we noticed it had excellent "bones", but was in dire need of updating. We signed the papers the day before Thanksgiving and have been working on projects ever since! Some have been minor projects, others have taken months to complete. We take pride in doing things ourselves, and also try to do them economically. My husband and I both work full-time and are enrolled in school full-time as well. Thankfully we enjoy home projects, and it is what we do in the small amount of spare time we have. We will both graduate with our degrees later this year, so it will free up more time to work on the house.


 After applying the MP, I then laid the fabric down. Since my fabric had a pattern, I had to be very careful that it was as straight as possible. Luckily since I had an almost thick layer of MP, I was able to manipulate the fabric and adjust it as needed. I did pull it up to reposition it a few times, but I think I got it pretty straight.
 I then used my hands and a spackle spatula to flatten the fabric and push out all the air bubbles. Be careful when doing this - when fabric gets any kind of moisture it can distort the pattern if you push/pull too much.I then applied a layer of MP on top of the fabric as well, working the MP through the entire fabric.


A reader sent me a message stating that they would like a little bit of background information about me, and as to why I have so many projects going on in my home.
Where to begin...My name is Sarah. I am a wife, mother, daughter, sister, aunt, and friend. I was recently married to my wonderful husband in August 2013. We have three wonderful children in our blended family. Chloe is 12, Maddox is 10, and Joaquin is 6. In late November 2013, we bought our first home. We spent months looking for a home as we wanted one with enough space for our children and also for entertaining our large families. Our home is quite eccentric, and I am proud to say it has a wonderful history. It was built in 1947 and we are only the third owners. While our home was very well maintained throughout the years, it was never updated. When our realtor showed us the home, we noticed it had excellent "bones", but was in dire need of updating. We signed the papers the day before Thanksgiving and have been working on projects ever since! Some have been minor projects, others have taken months to complete. We take pride in doing things ourselves, and also try to do them economically. My husband and I both work full-time and are enrolled in school full-time as well. Thankfully we enjoy home projects, and it is what we do in the small amount of spare time we have. We will both graduate with our degrees later this year, so it will free up more time to work on the house.
Now onto the project of the post!
Shortly after we moved, one of my closest friends also moved. Luckily for me, she needed to downsize and get rid of some extra furniture. I was more than willing to help her with her problem! One of the items she gave me was a dresser.
I should have taken a better picture of the dresser "before"; I apologize for the bad (and lack of) pictures now. I was just so excited to get going on it.
 |
The top drawer of the dresser actually has three "panels", while the other two were only one large flat panel.
Just plain white, and a little boring for my taste.
I wanted to cover it with fabric, but have a finish or seal of some type, so that it was durable enough for the 12 yr old Chloe.
I only wanted one knob on each side. I used wood filler on the extra hole.
A little light sanding and we were ready to get started.
I found some wonderful fabric at JoAnn's that is heavier duty, almost light canvas.
I also picked up some Matte finish Modge Podge. This is my very FIRST bottle of Modge Podge (MP). Yes, it may be hard to believe, but I have never used Modge Podge before this project. I was very excited to say the least. I read several tutorials about using fabric and MP to cover furniture. I combined them to come up with my own method.
It was very hard to take pictures during the entire process as I didn't wear gloves and my hands were covered in MP.
I cut the fabric about 3-4 inches larger than I needed, as I knew I would trim it down.
I first put a medium-thick layer of MP down on the drawer front. (I would recommend either a foam brush or at least one better than shown in the above pic. I was loosing bristles like crazy and was constantly picking them out of the MP.)
After applying the MP, I then laid the fabric down. Since my fabric had a pattern, I had to be very careful that it was as straight as possible. Luckily since I had an almost thick layer of MP, I was able to manipulate the fabric and adjust it as needed. I did pull it up to reposition it a few times, but I think I got it pretty straight.
The MP only takes about 10-20 minutes to set up and begin drying. I did one drawer at a time, so by the time I was done with one step on all three - I could go back to the first one. After covering the top surface, I then trimmed the excess fabric. I held it tight around the edges and then left about 3/4" that will only be seen on the interior of the drawer. I applied MP to the ends of the drawer fronts, repeating the same process from before. MP layer underneath and on top as well. For the corners, I tried to wrap it like present. and they turned out pretty well. My ends did get a little "muddy" from too much MP, so next time I will try to either wipe the excess with a rag or just not apply too much in the first place.
After all of the MP has dried, you can take a 220/320 grit sand paper and lightly sand the make smooth. Do not do this too much or you could actually start to damage the fabric. Follow this with a fine grade steel wool to lightly buff. I used a 0000 grade. For a final seal, I used a polyacrylic clear satin. Purchased at Wal-Mart for $3.97. A small amount goes a long way. After applying two coats I still have more than 3/4 of the little container left. I applied this using a small foam brush. Once completely dry, I used a 320 grit sandpaper for a very light sanding to make sure
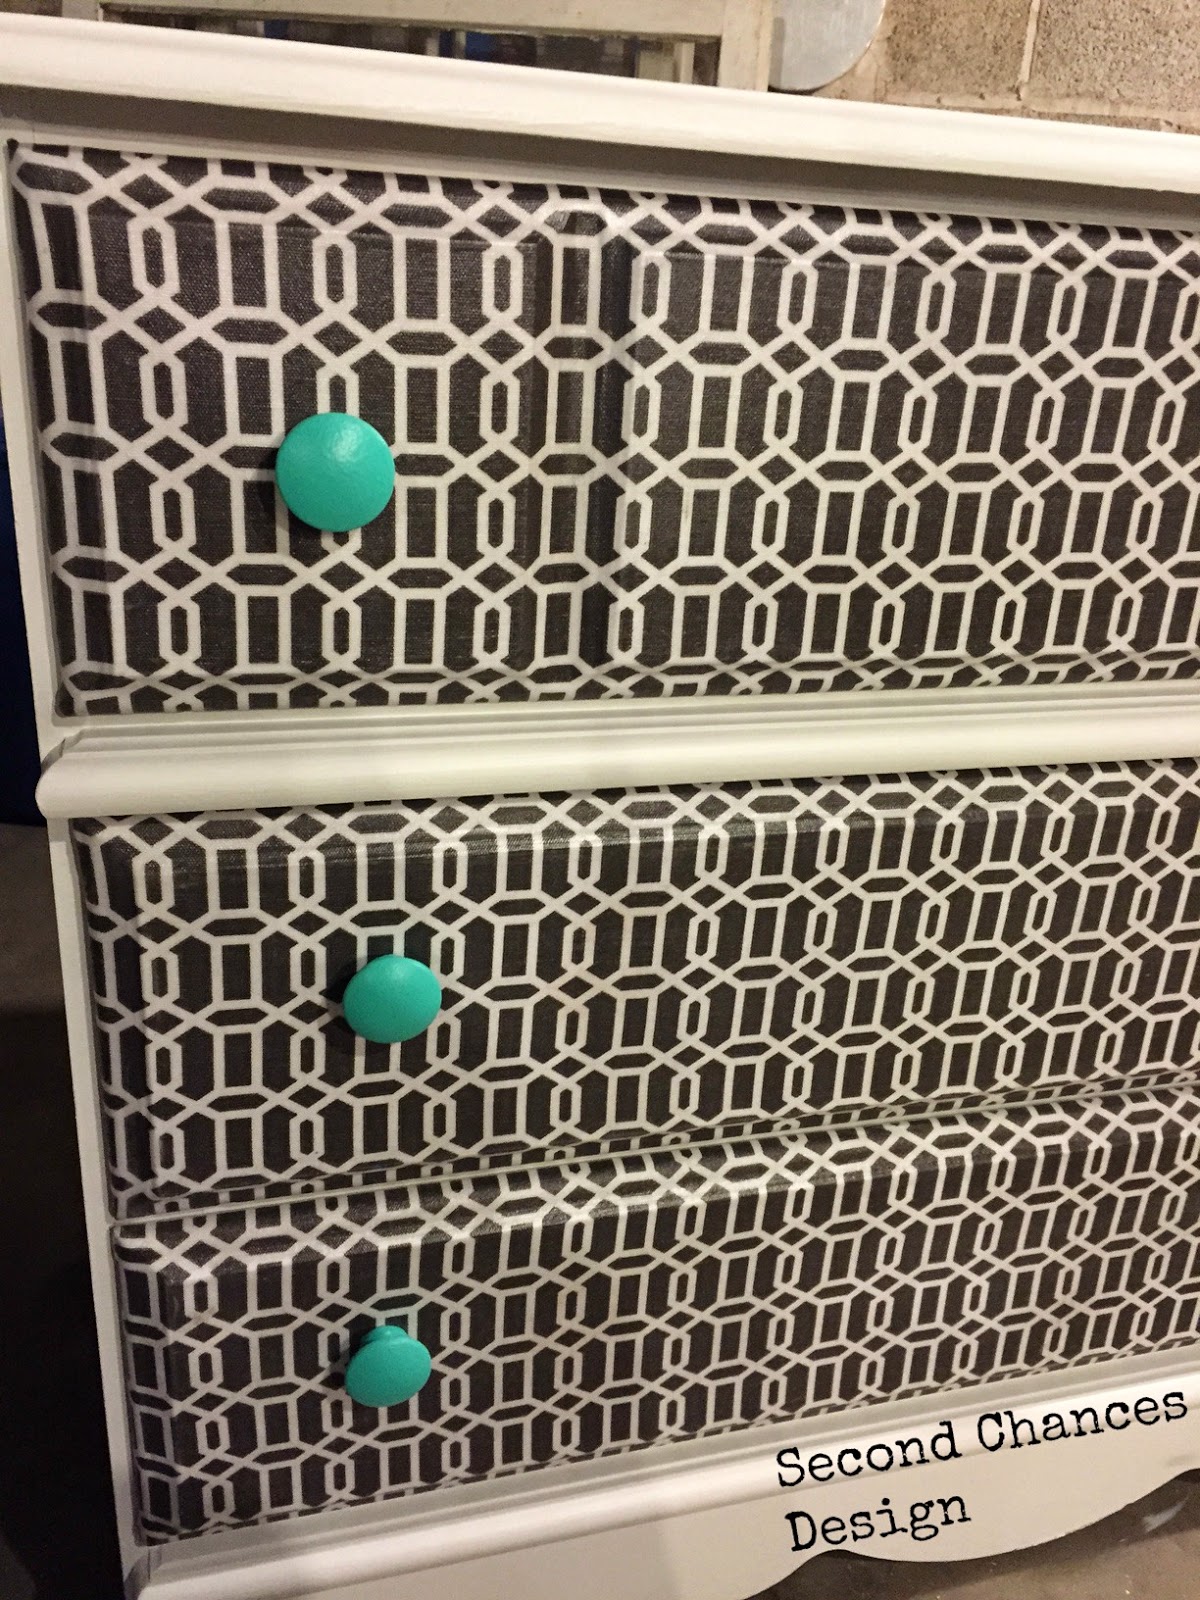
I used the same knobs that were on the dresser, but I repainted them with the same Sherwin-Williams "Synergy" that the room is painted - now it ties together.
I should mention that I did clean up the dresser itself with a fresh clean coat of white paint. I wanted to make sure that it was all uniform and was a complete fresh start.
For a first time MP project, I think this turned out alright. There are a few tips and tricks I will use next time, but I still LOVE how it turned out.
I do have to thank my hubby for the idea of painting the knobs "Synergy" - he's turning into my consultant. I love the POP of color!
This dresser will be going into my daughter's room, which will hopefully be complete sooner than later. The flooring is done now, and the trim was put in last night. A few paint touch ups to the trim and DONE! We are picking up her new bed today, and will hopefully find new bedding as well - later today when we go shopping.
Earlier this week I picked up two small end tables with beautiful wooden spindle legs. Plus I already had two other larger end tables. Today, we will be shopping and making a few stops to look for furniture and decor items. I'm always on the lookout!
I'm also very excited to hopefully be stoping at a stockist for Annie Sloan chalk paint. (Annie Sloan does not retail at your average paint or home improvement store. They call their locations "stockists".) This is something else that is new to me, and I'm thinking about trying it out. I have been researching Annie Sloan chalk paint, sealing with soft wax, antiquing using dark wax, etc. We will see what things that brings our way!
For future posts, I will try to take more pics, document brands, be a little more detailed. It's all a work in progress!
Thanks for taking the time to read this (very lengthy) blog post and I hope that it inspires you to create your own projects at home!
Happy Crafting!
Second Chances Design
Sarah
Love this!
ReplyDelete